Frequently Asked Question
How do I connect my valve to my Snugr installation?
Last Updated a year ago
Go to the installation wizard
- Go to the Snugr interface (local or remote, depending on your Snugr box). Then go to the "Settings" - "Installation" tab
- Click on the "Add a device" card
- Choose the device you wish to pair
- Select or create the room where your device is located
- Click on "Start pairing"
- You have 3 minutes to link the device
- At this stage, please follow the following instructions depending on the type of valve:
Valve EasyPelt v1.2 (without battery)
- After attaching your valve to the valve body, press and hold the button for 6 seconds, you will see the red light come on, then release.
- Wait a few seconds and then press the button for 3 seconds (release before the red light appears). You should hear and/or feel the valve move.
- Press the button once briefly for the valve to initialise. Then confirm on the interface that the link has been successful. If the valve is not initialised, press the button again briefly.Valve EasyPelt (without battery)
- After attaching your valve to the valve body, press both buttons for 10 seconds, you will see the lights flash.
- Wait a few seconds and then press one of the two buttons for 5 seconds (the green light will flash twice) and check if the valve has been connected to the interface. If not, repeat this step.
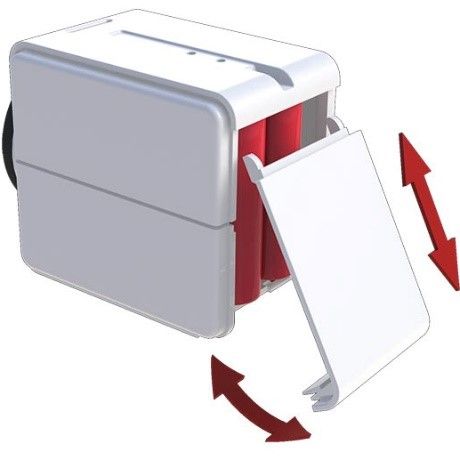
- The valve is now connected, press once briefly on one of the two buttons for the valve to initialise (measurement of the valve body needle amplitude).Valve EasyPelt Cube (without battery)
- After attaching your valve to the valve body, press the button for 10 seconds, you will see the lights flashing.
- Wait a few seconds and then press the button twice in less than 2 seconds (the red light will flash once) and check if the valve has been connected to the interface. If not, repeat this step.
- The valve is now connected, press the button once briefly for the valve to initialise (measure the amplitude of the valve body needle).Standard valve without display :
- If your radiator is already fitted with a thermostatic valve head, remove it.
- Place the supplied batteries (2x AA non-rechargeable) in the valve head and screw it onto the radiator (an adapter may be required).
- Press the button next to the "Antenna" symbol. When the connection is complete, the green light will flash 3 times. If the light has not blinked, the connection time has expired (repeat the procedure) or the radio signal level is insufficient (try moving the central unit or adding a signal repeater).

- If the red light flashes, click once briefly on the button with the spanner symbol to initialise the valve.
Valve (with display) :
- Briefly press button (01) on the device.
- The device starts its initialisation; wait until the procedure is completed and the symbol (02) disappears from the display. The device is now ready for use.
- Click the "Start Linking" button in this setup wizard; then press and hold the device button (01) until the link symbol appears. The device now sends the link message to the central box.
- The linking procedure is complete and you can, if you wish, set a temperature using the dial on the unit (03).If the error code "!53" appears, repeat step 3.
If, despite several attempts, this error code continues to appear, the device is probably out of range of the central unit and a signal repeater may be required.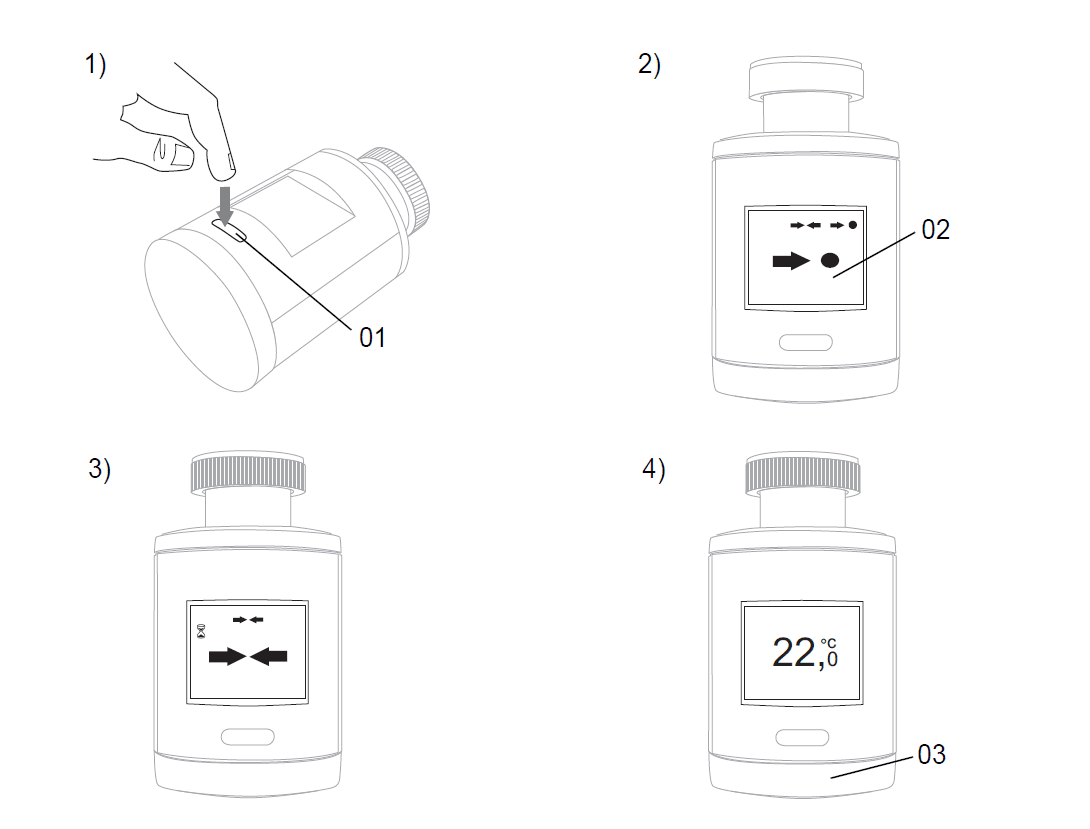
When the pairing has been completed,
- If you wish, add a description that will allow you to identify the valve, for example "left valve", in case you have several valves in the same room
- You can also check the signal with the corresponding icon, and thus validate the range of your device in relation to the central unit.